The query has to be between 2 and 50 characters


Products in this catalogue
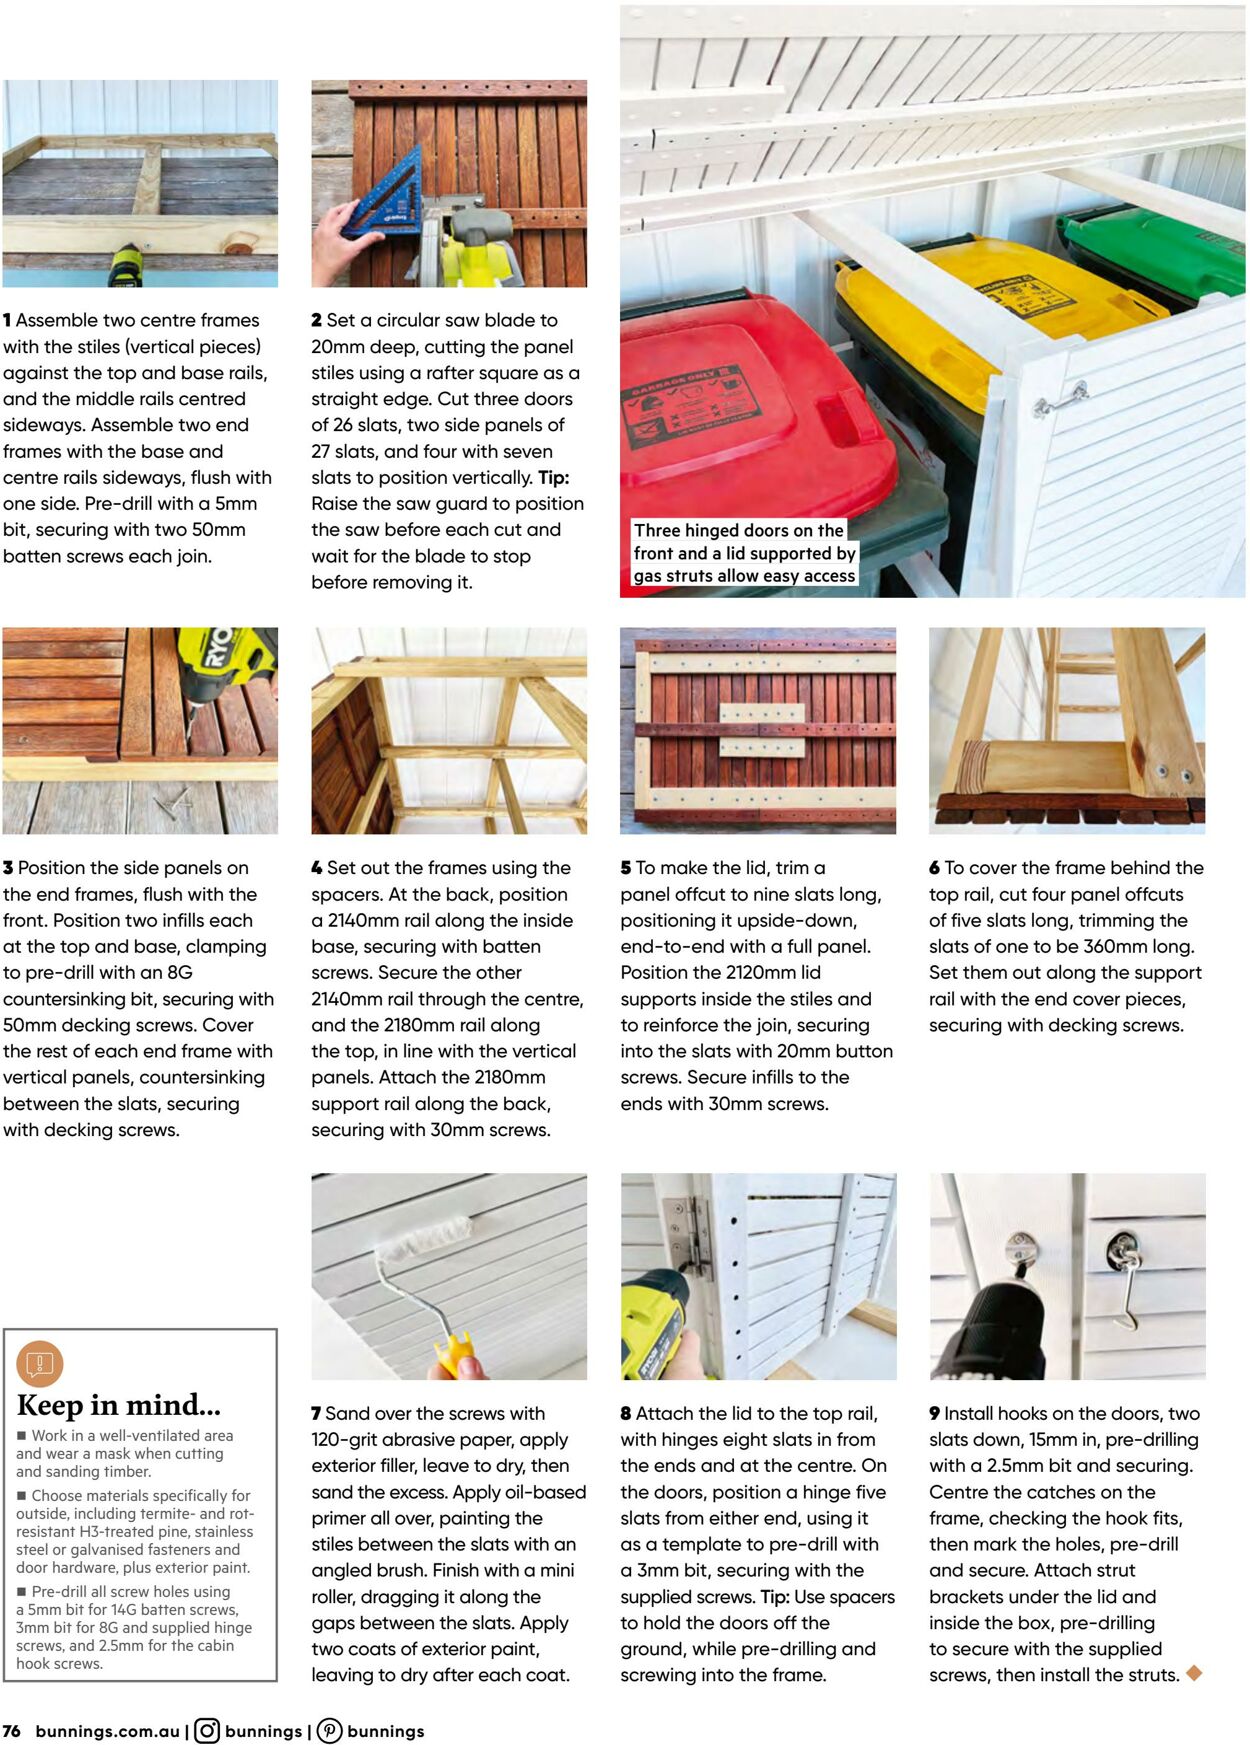
1 Assemble two centre frames with the stiles (vertical pieces) against the top and base rails, and the middle rails centred sideways. Assemble two end frames with the base and centre rails sideways, flush with one side. Pre-drill with a Smm. bit, securing with two 50mm. batten screws each join. 2 Set a circular saw blade to 20mm deep, cutting the panel stiles using a rafter square as a straight edge. Cut three doors of 26 slats, two side panels of 27 slats, and four with seven slats to position vertically. Ti Raise the saw guard to position the saw before each cut and wait for the blade to stop before removing it. TT/, ere 7 II// Three hinged doors on the front and a lid supported by gas struts allow easy access 3 Position the side panels on the end frames, flush with the front. Position two infills each at the top and base, clamping to pre-drill with an 8G countersinking bit, securing with 50mm decking screws. Cover the rest of each end frame with vertical panels, countersinking between the slats, securing with decking screws. Keep in mind... @ Work in a well-ventilated area and wear a mask when cutting and sanding timber. ™ Choose materials specifically for outside, including termite- and rot- resistant H3-treated pine, stainless steel or galvanised fasteners and door hardware, plus exterior paint. ™ Pre-drill all screw holes using a 5mm bit for 14G batten screws, 3mm bit for 8G and supplied hinge screws, and 2.5mm for the cabin hook screws. 4 Set out the frames using the spacers. At the back, position a 2140mm rail along the inside base, securing with batten screws. Secure the other 2140mm rail through the centre, and the 2180mm rail along the top, in line with the vertical panels. Attach the 2180mm support rail along the back, securing with 30mm screws. a Sx a 7 Sand over the screws with 120-grit abrasive paper, apply exterior filler, leave to dry, then sand the excess. Apply oil-based primer all over, painting the stiles between the slats with an angled brush. Finish with a mini roller, dragging it along the gaps between the slats. Apply two coats of exterior paint, leaving to dry after each coat. 76 bunnings.com.au | (O) bunnings | (P) bunnings 5 To make the lid, trim a panel offcut to nine slats long, positioning it upside-down, end-to-end with a full panel. Position the 2120mm lid supports inside the stiles and to reinforce the join, securing into the slats with 20mm button screws. Secure infills to the ends with 30mm screws. A 8 Attach the lid to the top rail, with hinges eight slats in from the ends and at the centre. On the doors, position a hinge five slats from either end, using it as a template to pre-drill with a 3mm bit, securing with the supplied screws. Tip: Use spacers to hold the doors off the ground, while pre-drilling and screwing into the frame. et 4 J 6 To cover the frame behind the top rail, cut four panel offcuts of five slats long, trimming the slats of one to be 360mm long. Set them out along the support rail with the end cover pieces, securing with decking screws. \ — ey 9 Install hooks on the doors, two slats down, 15mm in, pre-drilling with a 2.5mm bit and securing. Centre the catches on the frame, checking the hook fits, then mark the holes, pre-drill and secure. Attach strut brackets under the lid and inside the box, pre-drilling to secure with the supplied screws, then install the struts. ©


| Name | Details |
|---|
