The query has to be between 2 and 50 characters


Products in this catalogue
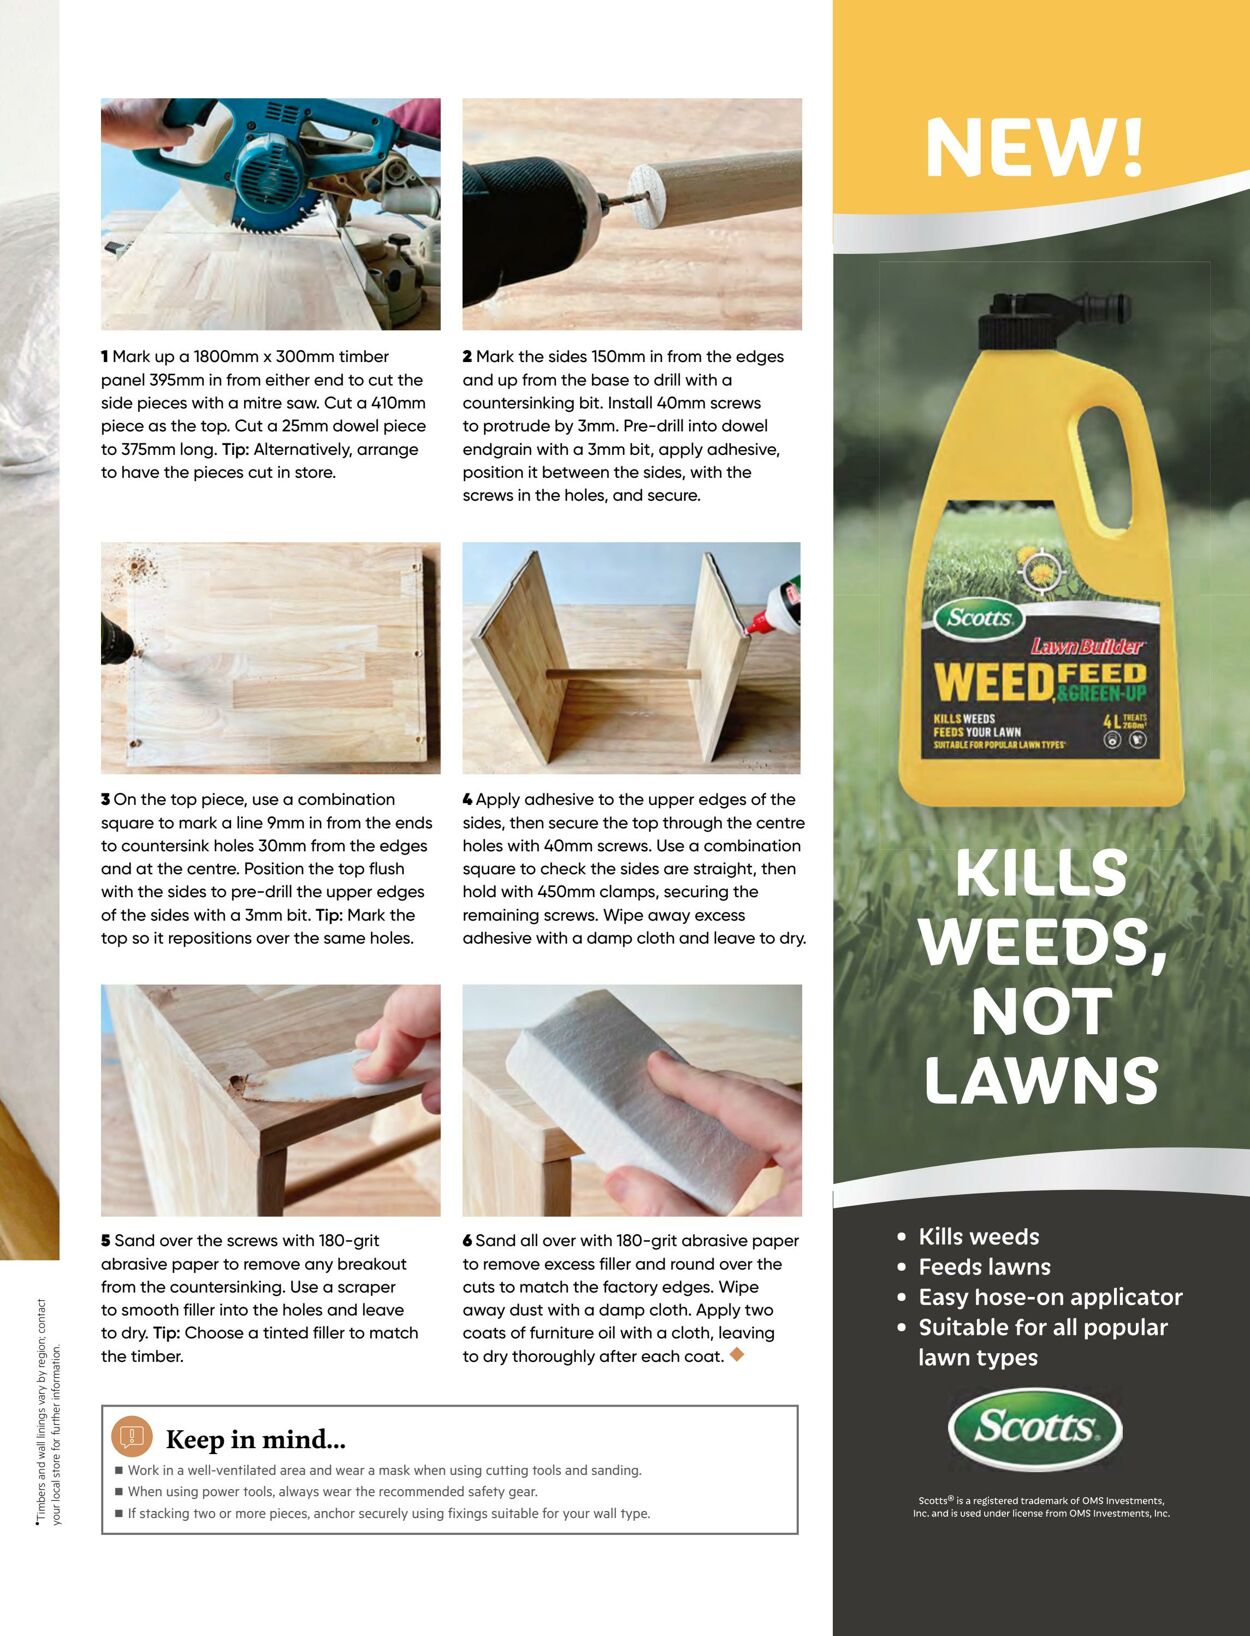
1 Mark up a 1800mm x 300mm timber panel 395mm in from either end to cut the side pieces with a mitre saw. Cut a 410mm piece as the top. Cut a 25mm dowel piece to 375mm long. Tip: Alternatively, arrange to have the pieces cut in store. ° 30On the top piece, use a combination square to mark a line 9mm in from the ends to countersink holes 30mm from the edges and at the centre. Position the top flush with the sides to pre-drill the upper edges of the sides with a 3mm bit. Tip: Mark the top so it repositions over the same holes. 5 Sand over the screws with 180-grit abrasive paper to remove any breakout from the countersinking. Use a scraper to smooth filler into the holes and leave to dry. Tip: Choose a tinted filler to match the timber. 2 Mark the sides 150mm in from the edges and up from the base to drill with a countersinking bit. Install 40mm screws to protrude by 3mm. Pre-drill into dowel endgrain with a 3mm bit, apply adhesive, position it between the sides, with the screws in the holes, and secure. 4 Apply adhesive to the upper edges of the sides, then secure the top through the centre holes with 40mm screws. Use a combination square to check the sides are straight, then hold with 450mm clamps, securing the remaining screws. Wipe away excess adhesive with a damp cloth and leave to dry. 6 Sand all over with 180-grit abrasive paper to remove excess filler and round over the cuts to match the factory edges. Wipe away dust with a damp cloth. Apply two coats of furniture oil with a cloth, leaving to dry thoroughly after each coat. Keep in mind... = Work in a well-ventilated area and wear a mask when using cutting tools and sanding. = When using power tools, always wear the recommended safety gear. 1m If stacking two or more pieces, anchor securely using fixings suitable for your wall type. Ae 4) ee KILLS WEEDS eo re 5 Kills weeds Feeds lawns Easy hose-on applicator Suitable for all popular lawn types


| Name | Details |
|---|