The query has to be between 2 and 50 characters


Products in this catalogue
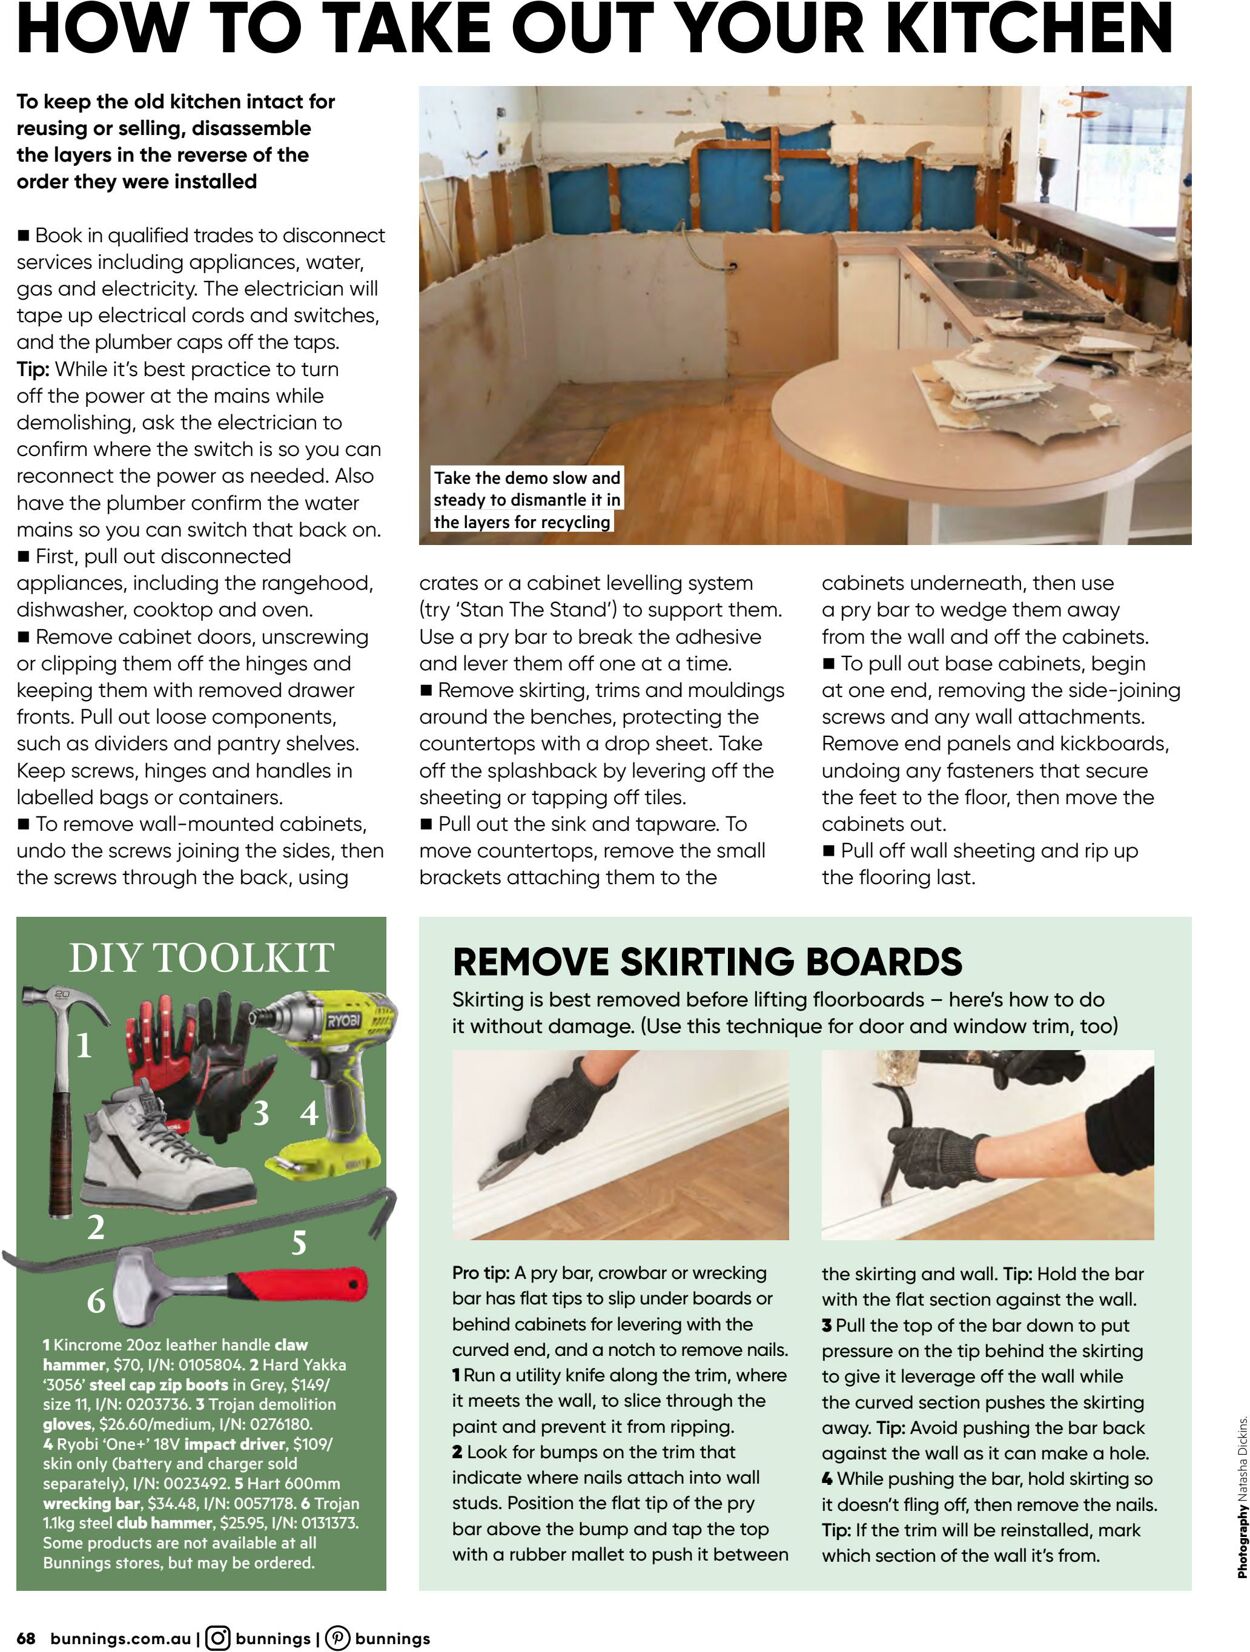
HOW TO TAKE OUT YOUR KITCHEN \ i To keep the old kitchen intact for reusing or selling, disassemble the layers in the reverse of the order they were installed ™ Book in qualified trades to disconnect services including appliances, water, gas and electricity. The electrician will tape up electrical cords and switches, and the plumber caps off the taps. Tip: While it's best practice to turn off the power at the mains while demolishing, ask the electrician to confirm where the switch is so you can reconnect the power as needed. Also have the plumber confirm the water mains so you can switch that back on. @ First, pull out disconnected appliances, including the rangehood, dishwasher, cooktop and oven. m Remove cabinet doors, unscrewing or clipping them off the hinges and keeping them with removed drawer fronts. Pull out loose components, such as dividers and pantry shelves. Keep screws, hinges and handles in labelled bags or containers. @ To remove wall-mounted cabinets, undo the screws joining the sides, then the screws through the back, using DIY TOOLKIT Bure era UCU ee Day Lee Roc BT eke BORLA OOS et ee MC EUR UC) Paes Oo PA eae A ak ACL ERAGE Neu Ra ue asa) ETE M rey Pe Da Re Se MAR OT Dees er eu ya MORIA Sic eericheecie el oeie| Soon ease ces Take the demo slow and ‘steady to dismantle it in the layers for recyc! Fle crates or a cabinet levelling system (try ‘Stan The Stand’) to support them. Use a pry bar to break the adhesive and lever them off one at a time. m@ Remove skirting, trims and mouldings around the benches, protecting the countertops with a drop sheet. Take off the splashback by levering off the sheeting or tapping off tiles. @ Pull out the sink and tapware. To move countertops, remove the small brackets attaching them to the cabinets underneath, then use apry bar to wedge them away from the wall and off the cabinets. @ To pull out base cabinets, begin at one end, removing the side-joining screws and any wall attachments. Remove end panels and kickboards, undoing any fasteners that secure the feet to the floor, then move the cabinets out. @ Pull off wall sheeting and rip up the flooring last. REMOVE SKIRTING BOARDS Skirting is best removed before lifting floorboards — here's how to do it without damage. (Use this technique for door and window trim, too) Pro tip: A pry bar, crowbar or wrecking bar has flat tips to slip under boards or behind cabinets for levering with the curved end, and a notch to remove nails. 1Run a utility knife along the trim, where it meets the wall, to slice through the paint and prevent it from ripping. 2 Look for bumps on the trim that indicate where nails attach into wall studs. Position the flat tip of the pry bar above the bump and tap the top with a rubber mallet to push it between 68 bunnings.com.au | (O) bunnings | ®) bunnings the skirting and wall. Tip: Hold the bar with the flat section against the wall. 3 Pull the top of the bar down to put pressure on the tip behind the skirting to give it leverage off the wall while the curved section pushes the skirting away. Tip: Avoid pushing the bar back against the wall as it can make a hole. 4 While pushing the bar, hold skirting so it doesn't fling off, then remove the nails. Tip: If the trim will be reinstalled, mark which section of the wall it’s from.


| Name | Details |
|---|